

How to Sync Audio in Adobe Premiere Pro for Crisp, Professional Sound
If you've ever recorded video with an external microphone, you know the struggle—your camera's built-in audio sounds like it was recorded in a tin can, but your high-quality external recording needs to be synchronized. Luckily, Adobe Premiere Pro makes this process quick and painless. In this article, I’ll walk you through how to sync your audio like a pro, step by step. And if you prefer a video demonstration (or just want to hear my voice), you can check out my tutorial.
Why Syncing Audio Matters
Before we get into the “how,” let’s talk about the “why.” If you’re thinking, Why not just use the audio from the camera?—I get it. But onboard camera mics are designed to pick up everything in the room: your voice, the hum of your fridge, your neighbor’s dog, and possibly even your existential dread. External microphones, however, give you that crisp, studio-quality sound. The catch? You have to sync them up. Otherwise, you’ll end up with a weird out-of-sync dub effect, like a bad foreign film from the ‘70s.
Step 1: Capture Your Sync Point
Before we even get into Premiere, we need a clear sync point. This is where the classic clap (or a slate) comes in handy. Clapping creates a sharp audio spike that’s easy to match visually when lining up the waveforms later. You can do this on or off camera—either way, it gets the job done. If you’re feeling fancy, you could use an actual clapperboard like the pros. If you’re like me, you’ll probably just aggressively smack your hands together and hope for the best.
Pro Tip: If you forget to clap, don’t panic. You can use any sharp noise—a snap, a knock, or even an overly dramatic “Aha!”—as long as it creates a distinct sound for reference.
Step 2: Import Your Footage and Audio
Once you’ve transferred both your video and external audio files to your computer, bring them into Premiere Pro:
Import the video file from your camera.
Import the audio file from your external recorder (like my Rode Interview Pro).
Drag both into a new sequence (mine is set to HD 1080p at 23.976 fps, but use whatever matches your project settings).
Step 3: Align and Sync Automatically
Now, let’s make the magic happen:
Drag your video onto the timeline.
Drag your external audio beneath it (on a separate track, like Audio Track 2).
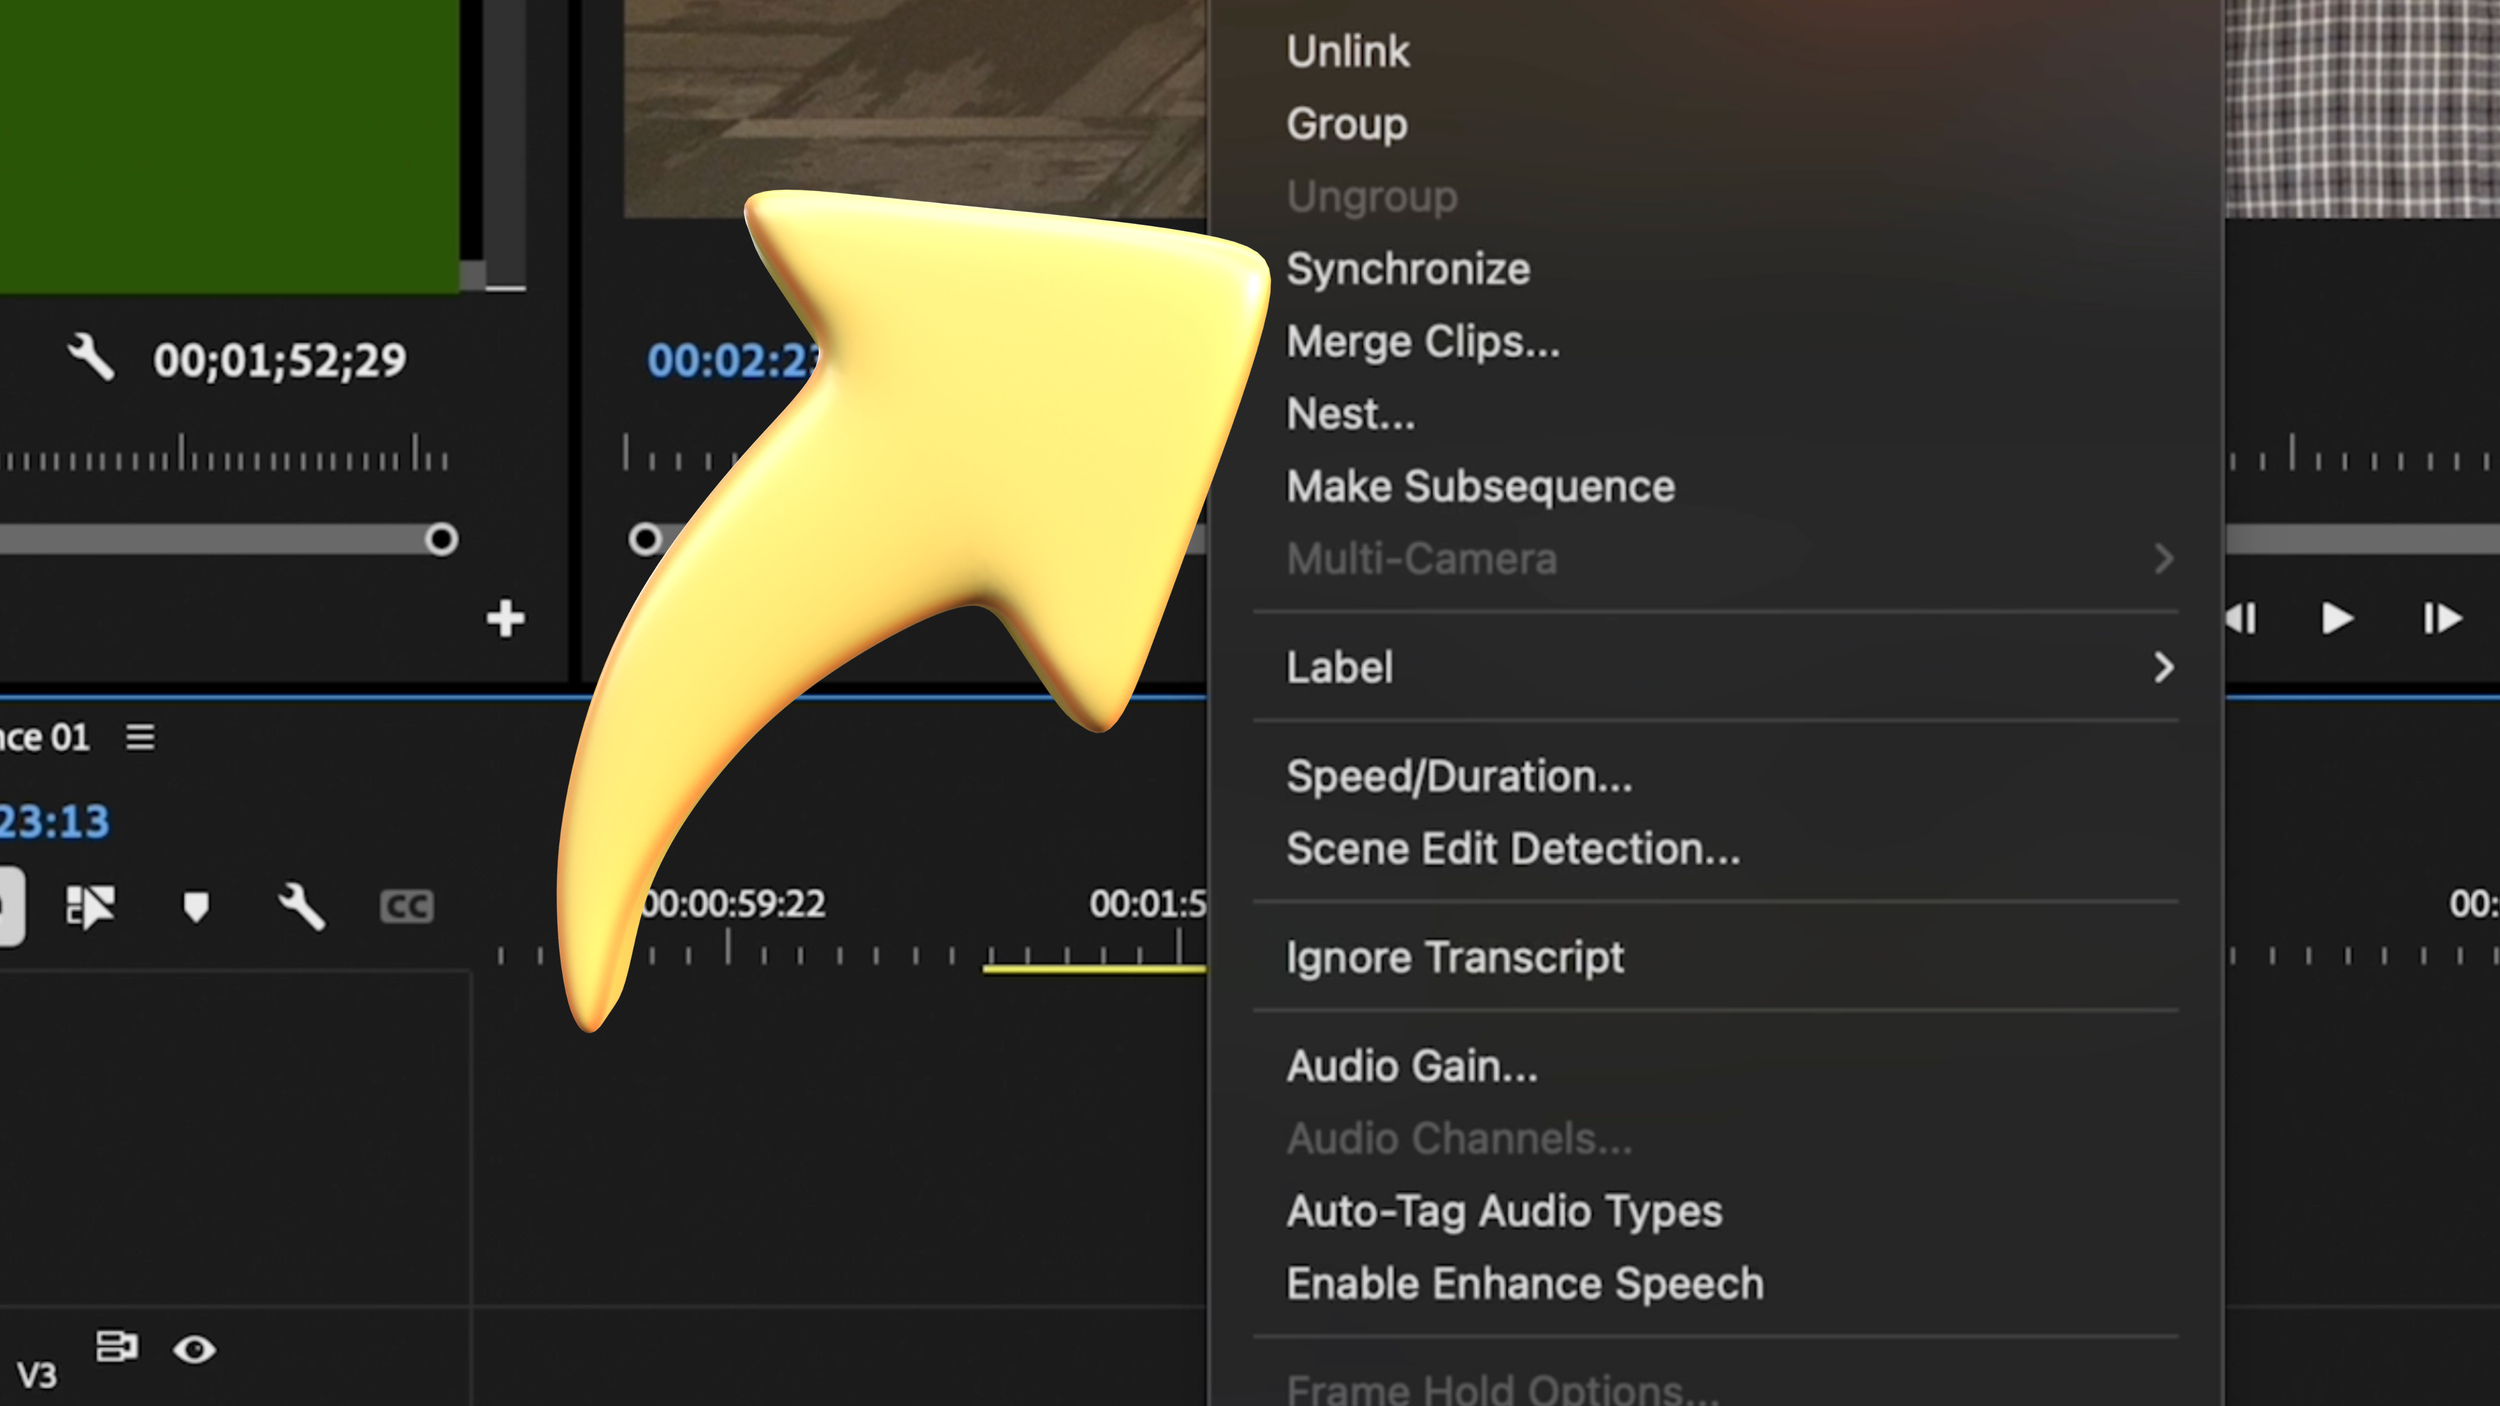
Select both the video and audio clips.
Right-click and choose Synchronize.
In the pop-up menu, select Audio Track 1 and click OK.
Watch as Premiere automatically shifts your audio into perfect sync!
Boom! Just like that, your video and audio are lined up without you having to painstakingly nudge things frame by frame like some sort of film-editing archaeologist.
Step 4: Clean Up and Finalize
Now that your audio is aligned, let’s tidy things up:
Trim the beginning of the clip to remove unnecessary noise.
Delete the camera’s onboard audio—your external mic sounds much better.
Move your external audio track up to replace the old one for a cleaner timeline.
At this point, hit play and give it a listen. If everything sounds good and your lips aren’t doing their own thing separate from your voice, you’re golden.
Step 5: Fine-Tuning for the Best Sound
Syncing your audio is half the battle. Now, let’s make sure it actually sounds amazing:
Adjust the levels – Your external audio might be too quiet or too loud. Use the Audio Track Mixer to balance it properly.
Add some EQ – If your voice sounds too bass-heavy or tinny, a quick EQ adjustment can fix that.
Reduce background noise – If there’s an annoying hum in the background, use Premiere’s DeNoise effect to clean it up.
Use compression – This helps even out the peaks and valleys in your audio, making it sound more polished.
If you’ve ever wondered why professional videos sound so full and balanced, these little tweaks are the secret sauce.
Bonus Tip: Why Clapping Matters
If you’re wondering why we clap or use a slate, it’s because that quick, sharp sound creates an easy-to-spot waveform spike in both audio tracks. This makes manual syncing a breeze if the automatic method ever fails.
But here’s a fun fact—clapping also has historical roots. Back in the early days of filmmaking, editors had no fancy software to sync audio. They relied on physical film reels and audio tapes, which had to be meticulously matched. A clap provided a simple, universal way to sync everything up. So, when you clap, you’re actually carrying on a time-honored tradition. Congratulations, you’re part of film history!
Common Issues and How to Fix Them
Even though Premiere Pro does a great job syncing audio, sometimes things don’t go as planned. Here are a few troubleshooting tips:
Sync isn’t working? Make sure your clips have clear, distinct audio. If your external mic didn’t pick up any camera sound at all, Premiere won’t have anything to match against.
Audio is slightly off? Try manually nudging it forward or backward using the arrow keys while zoomed in.
Echo or double audio? You probably forgot to mute or delete the camera’s built-in mic track. Go ahead and take care of that.
That’s It!
And just like that, your audio is locked in, giving your project the crisp, professional sound it deserves. Whether you're shooting interviews, tutorials, or cinematic sequences, syncing your audio properly is a game-changer.
Now go forth and edit! And if you want to see this in action, be sure to check out my full video tutorial at StreamSemester’s Official YouTube channel!
Happy editing!
Meet the Author, Josh Dempsey
Josh Dempsey teaches video and film at Marietta High School in Marietta, Georgia, where he’s been shaping young storytellers for nearly 20 years. Somehow, he’s managed to stay just as excited as his students—probably because there’s always something new to learn in this ever-evolving world of visual storytelling. Want to see what his students are up to? Follow their creative chaos on social media @bdn_marietta.
When he’s not geeking out over cameras and editing software, Josh is hitting the road with his wife, Megan, their three kids, and a borderline illegal number of pets. Together, they’re masters of the RV life, road trip pros, and always one questionable turn away from an unexpected adventure. If you’re into travel tips, RV hacks, or just want to see how much chaos a family can cram into a camper, check them out on Instagram @eastrollswest.


Got shaky footage? No problem! In this quick tutorial, learn how to use Warp Stabilizer in Adobe Premiere Pro to smooth out your shots effortlessly.